
스튜디오 배경

Studio Background

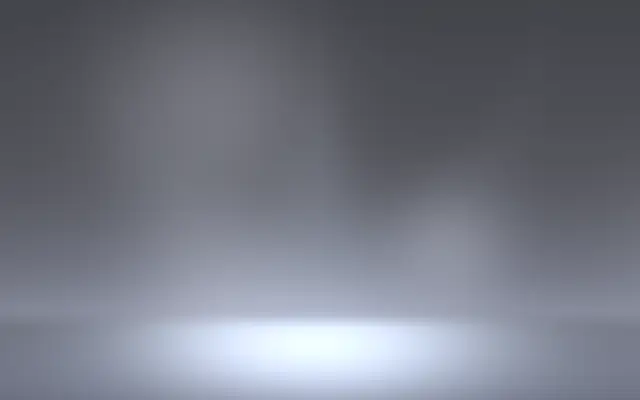
여러 방향의 조명과 은은한 움직임을 더해 스튜디오 촬영 배경을 만듭니다.

다른 이름: StudioBackgroundStudio backdrop

WebGPU 를 지원하는 브라우저에서 움직입니다

이 기기에서는 데모를 그리지 못해 정지 화면을 보여 줍니다

React
// WebGPU 를 지원하는 브라우저에서만 그립니다.
import { Shader, StudioBackground } from 'shaders/react'

export default function ShaderEffect() {
  return (
    <Shader style={{ width: '100%', height: 320 }} disableTelemetry>
      <StudioBackground />
    </Shader>
  )
}
Vue
<!-- WebGPU 를 지원하는 브라우저에서만 그립니다. -->
<script setup lang="ts">
import { Shader, StudioBackground } from 'shaders/vue'
</script>

<template>
  <Shader style="width: 100%; height: 320px" :disable-telemetry="true">
    <StudioBackground/>
  </Shader>
</template>
Svelte
<!-- WebGPU 를 지원하는 브라우저에서만 그립니다. -->
<script>
  import { Shader, StudioBackground } from 'shaders/svelte'
</script>

<Shader style="width: 100%; height: 320px" disableTelemetry>
  <StudioBackground />
</Shader>
Solid
// WebGPU 를 지원하는 브라우저에서만 그립니다.
import { Shader, StudioBackground } from 'shaders/solid'

export default function ShaderEffect() {
  return (
    <Shader style={{ width: '100%', height: '320px' }} disableTelemetry>
      <StudioBackground />
    </Shader>
  )
}
JavaScript
// WebGPU 를 지원하는 브라우저에서만 그립니다.
// <canvas id="canvas" style="width:100%;height:320px"></canvas> 가 페이지에 있어야 한다
import { createShader } from 'shaders/js'

const shader = await createShader(document.getElementById("canvas"), {
  components: [
    {
      type: 'StudioBackground',
    }
  ]
}, { disableTelemetry: true })

속성(props) · StudioBackground

값을 바꾸면 위 데모와 코드 탭에 바로 반영됩니다. 설명은 라이브러리 레지스트리의 영어 원문(MIT)입니다.

이름값기본값범위·선택지설명(원문)
colorSurface Color#d8dbec—Base studio surface color
keyColorKey Color#d5e4ea—Color of the overhead key light
keyIntensityIntensity400 – 100 (step 1)Intensity of the key light
keySoftnessSoftness500 – 100 (step 1)How diffuse the key light is
fillColorFill Color#d5e4ea—Color of the side fill lights
fillIntensityIntensity100 – 100 (step 1)Intensity of the fill lights
fillSoftnessSoftness700 – 100 (step 1)How diffuse the fill lights are
fillAngleSpread700 – 100 (step 1)How far apart the fill lights are from center
backColorBack Color#c8d4e8—Color of the upward back wash
backIntensityIntensity200 – 100 (step 1)Intensity of the back wash
backSoftnessSoftness800 – 100 (step 1)How diffuse the back wash is
brightnessAmbient200 – 100 (step 1)Overall ambient light level
vignetteVignette00 – 100 (step 1)Edge darkening
centerStage Center
x0.5y0.8
{"x":0.5,"y":0.8}x, y: 0 – 1Where the spotlight meets the floor
lightTargetLight Depth1000 – 100 (step 1)How far toward the floor vs wall the spotlights aim
wallCurvatureWall Curvature100 – 100 (step 1)How rounded the cove is
ambientIntensityAmbient Detail500 – 100 (step 1)Intensity of drifting ambient lights
ambientSpeedSpeed2-5 – 5 (step 0.1)Drift speed
seedSeed00 – 100 (step 1)Seed for ambient pattern

모든 컴포넌트 공통: blendMode · opacity · visible · maskSource/maskType · boundingBox · id

제품 사진 촬영용 호리존처럼, 바닥과 벽이 이어지는 무대에 여러 조명이 비친 모습입니다. 제품이나 도형을 올려 놓고 스튜디오 같은 바탕을 만들 때 쓸 수 있습니다.

`keyIntensity`를 올리면 위쪽 주 조명이 강해지고, `fillIntensity`를 올리면 옆 채움 조명이 강해집니다(각 기본 40·10, 범위 0–100). `center`는 스포트라이트가 바닥에 닿는 위치입니다(기본 x=0.5, y=0.8). `wallCurvature`를 올리면 벽과 바닥이 이어지는 곡면이 더 둥글어집니다(기본 10, 범위 0–100). `ambientSpeed`는 움직이는 주변광의 속도입니다(기본 2, 범위 -5–5).

이 레이어 자체가 배경을 생성하므로 밑에 이미지 입력을 둘 필요가 없습니다. 전경 제품·도형과 조명 방향이 어울리는지 먼저 확인하고, 배경이 주인공보다 밝거나 복잡해지면 조명 세기와 곡면의 존재감을 줄이세요. 정적인 촬영 배경이 필요하다면 움직임을 낮추면 됩니다.

언제 쓰나

제품이나 도형을 스튜디오 무대 위에 놓은 듯 보여줄 때, 여러 방향의 빛이 있는 배경이 필요할 때, 전경 오브젝트의 형태를 조명으로 드러낼 때 좋습니다. 평평하고 방해되지 않는 단색 배경이 필요한 화면에는 피하세요.

페이지로 열기 ↗