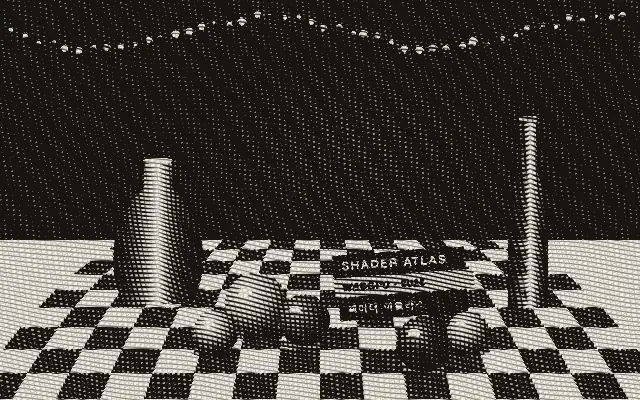
Redraws an image as flowing line work whose weight changes with brightness, like a copperplate engraving.
Also known as: Engravingcopperplate engravingline engraving
Moves in browsers that support WebGPU
This device could not render the demo — showing a still
Code reflects the control values
React
// Renders only in browsers with WebGPU.
// /samples/… are this site’s sample files — point them at your own image or video.
import { Shader, Engraving, ImageTexture } from 'shaders/react'

export default function ShaderEffect() {
  return (
    <Shader style={{ width: '100%', height: 320 }} disableTelemetry>
      <ImageTexture
        objectFit="cover"
        url="/samples/still.jpg" />
      <Engraving />
    </Shader>
  )
}
Vue
<!-- Renders only in browsers with WebGPU. -->
<!-- /samples/… are this site’s sample files — point them at your own image or video. -->
<script setup lang="ts">
import { Shader, Engraving, ImageTexture } from 'shaders/vue'
</script>

<template>
  <Shader style="width: 100%; height: 320px" :disable-telemetry="true">
    <ImageTexture
      object-fit="cover"
      url="/samples/still.jpg"/>
    <Engraving/>
  </Shader>
</template>
Svelte
<!-- Renders only in browsers with WebGPU. -->
<!-- /samples/… are this site’s sample files — point them at your own image or video. -->
<script>
  import { Shader, Engraving, ImageTexture } from 'shaders/svelte'
</script>

<Shader style="width: 100%; height: 320px" disableTelemetry>
  <ImageTexture
    objectFit="cover"
    url="/samples/still.jpg" />
  <Engraving />
</Shader>
Solid
// Renders only in browsers with WebGPU.
// /samples/… are this site’s sample files — point them at your own image or video.
import { Shader, Engraving, ImageTexture } from 'shaders/solid'

export default function ShaderEffect() {
  return (
    <Shader style={{ width: '100%', height: '320px' }} disableTelemetry>
      <ImageTexture
        objectFit="cover"
        url="/samples/still.jpg" />
      <Engraving />
    </Shader>
  )
}
JavaScript
// Renders only in browsers with WebGPU.
// /samples/… are this site’s sample files — point them at your own image or video.
// expects <canvas id="canvas" style="width:100%;height:320px"></canvas> on the page
import { createShader } from 'shaders/js'

const shader = await createShader(document.getElementById("canvas"), {
  components: [
    {
      type: 'ImageTexture',
      props: {
        objectFit: 'cover',
        url: '/samples/still.jpg',
      },
    },
    {
      type: 'Engraving',
    }
  ]
}, { disableTelemetry: true })
Props · Engraving
Changes apply to the demo above and to the code tabs. Descriptions come from the library registry (MIT).
Name
Value
Default
Range / options
Description
styleStyle
crosshatch
line · crosshatch · spiral
The engraving cut: a single line plate, cross-hatched plates building up the shadows, or one continuous spiral
frequencyFrequency
90
20 – 300 (step 1)
Line density — how many engraved lines span the height of the canvas
angleAngle
8
0 – 360 (step 1)
Direction of the base line work (in degrees)
centerCenter
xy
{"x":0.5,"y":0.5}
x, y: 0 – 1
Center the spiral coils outward from
reliefRelief
0.6
0 – 2 (step 0.01)
How strongly the image brightness displaces the lines — the engraved 'lines climb over the form' effect
wavinessWaviness
0.35
0 – 1 (step 0.01)
Organic meander of the line work, like a hand-pulled burin stroke
contrastContrast
1.15
0.25 – 3 (step 0.01)
Tonal contrast applied before the lines are cut — higher pushes mid-tones toward pure line or pure paper
inkColorInk
#1a1410
—
Color of the engraved ink
paperColorPaper
#f4eee2
—
Paper color shown between the lines
Every component also takes blendMode · opacity · visible · maskSource/maskType · boundingBox · id
It turns an image’s tones into the density of engraved lines, like a banknote portrait or an old print. The lines follow the form and become heavier in darker areas.
The default `style` is `crosshatch` and selects how the lines are cut. `frequency` defaults to 90 and ranges from 20 to 300 to set line density; `angle` defaults to 8 degrees and ranges from 0 to 360 degrees to set the base direction. `relief` defaults to 0.6 and ranges from 0 to 2 to control how much lines follow the form, while `contrast` defaults to 1.15 and ranges from 0.25 to 3 to adjust tonal separation.
Place an image input underneath to create the line drawing. Pair it with `Halftone` or `Chalkboard` for printmaking or drawing textures, but dense lines can merge small contours into dark patches.
When to use
Use it for historical posters, banknote-style portraits, and print-inspired illustrations. Avoid it for crisp, simple icons or small UI elements.